Quick start
This guide walks through the entire process from scratch: installing NestSpace, importing your first APK, launching apps, and duplicating them. Nothing requires root or an accessibility service, and using the phone does not require a computer or adb.
1. Check the system version
- Android 7.0 (API 24) or later.
- Android 7.1, 15, 16, and 17 have been verified.
- If the target app contains only arm64 native libraries, an arm64 physical device is required; an x86_64 emulator returns
ABI_MISMATCHbefore launch.
2. Install NestSpace
Download the official packaged APK from Releases (the file is named like NestSpace-v1.0.1.apk), or build it yourself by following Building from source, then install it like an ordinary APK.
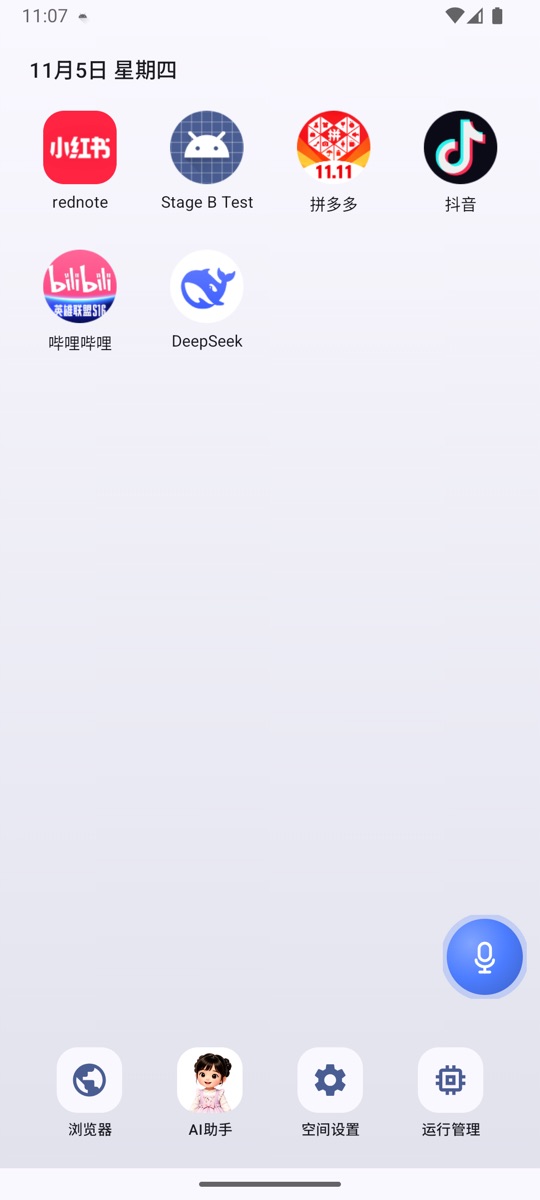
The first launch opens the NestSpace desktop. By default, the desktop contains:
- Space settings: The entry point for all configuration and apps.
- AI assistant: The local AI assistant.
- Browser: The built-in multi-tab browser.
- Running apps: View the currently running container processes and their memory usage.
Virtual apps installed later, along with any selected system apps, also appear here.
3. Put system apps on the desktop (optional)
If you want to open apps already installed on the phone directly from the NestSpace desktop:
- Tap Space settings.
- Tap App management.
- Tap Import desktop apps.
- Select the apps you need; tap an app again to deselect it.
- Return to the desktop. The selected apps are now there.
NestSpace does not copy these system apps; it only creates a desktop shortcut. Tapping it still opens the original app.
4. Import your first APK
- First put the APK somewhere the phone can access (for example, the Download folder).
- Tap Space settings → App management → Import APK.
- Select the APK in the system file picker.
- Wait for the import to finish. After a successful install, the app appears automatically on the desktop and in the Virtual apps list under App management.
If the app uses the split format (one base APK plus multiple split APKs):
- Select
base.apkand all of the splits at once in the file picker. - Selecting only the base leaves out resources or native libraries, and the app may fail to start.
The import performs these checks:
- Whether the package name is valid;
- Whether signatures match when importing the same app again;
- Whether
minSdkis higher than the current system version; - Whether the APK declares
REQUIRE_SECURE_ENV.
If validation fails, the reason is shown on the import page and the app is not installed.
5. Launch an app
Go to Space settings → App management and find the app you just imported:
- On the left side of the app row, you can select Instance 1, Instance 2, and so on.
- Tap Launch to open the selected instance.
- Tap Duplicate to create and launch a new instance.
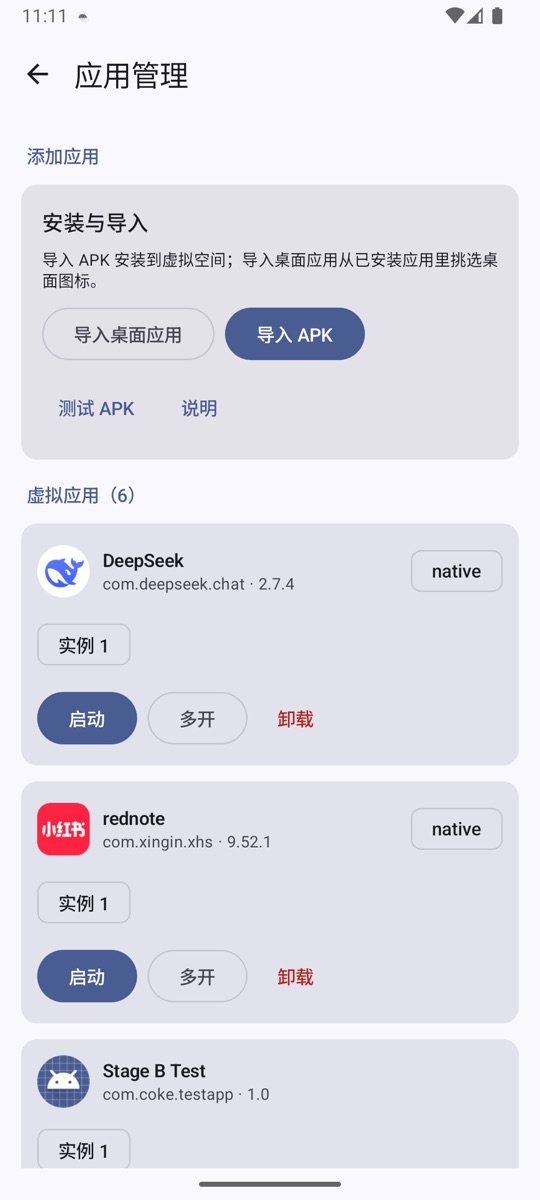
Each instance has its own files, cache, code_cache, databases, and SharedPreferences namespace, so two instances can be signed in to two accounts of the same app at the same time.
6. Organize the desktop
- Long-press an app icon: Open, app shortcuts, move to front/back, app info; if folders already exist, you can also add the app to a folder. Virtual apps can be uninstalled, and system apps can be removed from the desktop.
- Long-press an empty area: New folder, Model settings, Permissions.
- Long-press and drag: Reorder icons. Drag onto another app and, with a small overlap, a folder ghost appears and a folder is created; once the overlap reaches 30% or more, the behavior changes to insertion/shifting. Drag onto an existing folder to add the app to it.
- Folders: You can open, rename, add apps to, or dissolve them. Once open, long-press an app to remove it, or drag it upward to remove it. A folder with only one app left dissolves automatically.
- Wallpaper: Space settings → Desktop wallpaper.
- The desktop layout is saved automatically and persists after a restart.
7. Use the AI assistant (optional)
Tap AI assistant on the desktop:
- If no model is configured, the built-in rule-based Agent is used. It can perform simple actions such as "observe", "open settings", or "tap Search".
- After configuring a Claude-compatible or OpenAI-compatible endpoint in Space settings → Model settings, the assistant can perform more complex multi-step tasks. Replies are displayed as streaming text, and tool calls appear as expandable cards.
- When a conversation ends, the assistant automatically organizes memories; successful multi-step tasks can be drafted into skills automatically. Facts and preferences take effect directly; reusable procedures take effect directly under Standard permissions and are confirmed in the chat first under Strict permissions. Automatically drafted skills are disabled by default and must be enabled manually.
For details, see AI assistant.
8. Uninstall a virtual app
There are two ways:
- Long-press the desktop icon → Uninstall.
- Space settings → App management → Uninstall in the app row.
Uninstalling deletes the installed APK, all instances of the app, and all instance data. This cannot be undone.
9. Where data is stored
In NestSpace's app-private directory:
/data/user/0/com.coke.nestspace/files/vspace/
  apps/                      Installed APKs
  data/<package>/<instance>/ Instance data
Regular users do not need to access these directories manually. Uninstalling NestSpace itself also clears all virtual apps and instance data.
Next steps
- App installation & management: Details about split APKs, signatures, instances, and data directories.
- Settings: Container slots, Permissions, the Floating dot, and more.
- MCP control service: Control NestSpace with Claude Code on your computer.